
Share
Read Next

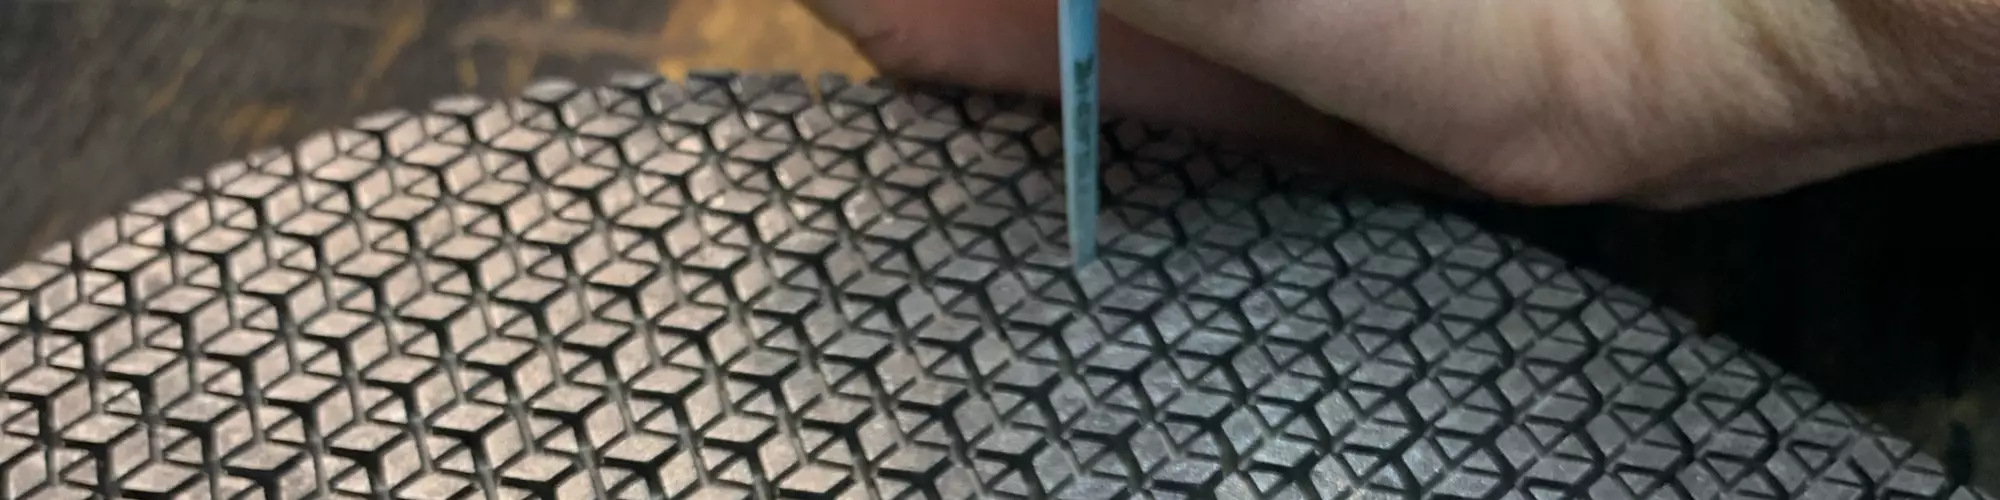
Structural rib areas in injection mold cavity that will form a speaker grill or cover for a watercraft stereo system. Once the mold is CNC machined, it goes to the EDM department to remove the final material, creating fine detail areas. This process creates scaling or a rough finish that must be benched or polished out. Using the right polishing tools and process is vital to the final finish.
Photo Credit: D.W. Sales
Ribs are the support structures on the back of a plastic part. Structural rib areas in an injection mold cavity can be a daunting task for a mold polisher faced with getting the mold surface to the final finish. The final step in the mold building process is not only to polish the steel’s core surface and cavity, so it does not stick in the mold during the molding cycle, but to achieve the required final surface finish.
Here are four simple steps to follow when polishing ribs:


1. Invest in the proper tools.
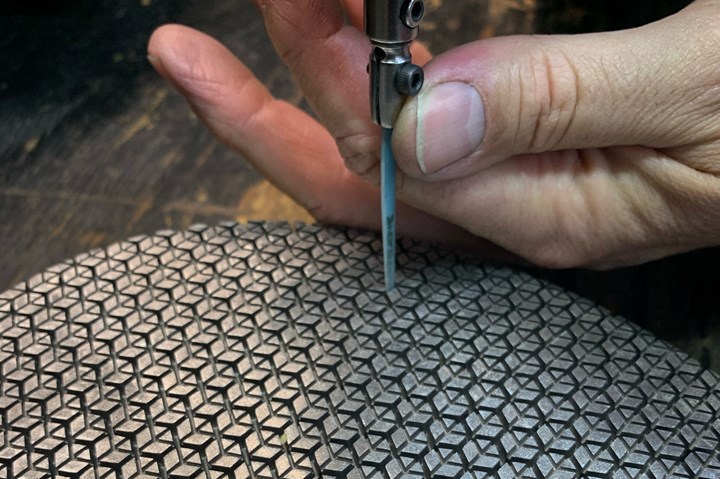
Having the proper tools to do a large amount of polishing in a short period of time is vital. Several electric- and pneumatic-powered tools are available, so matching the right power, speed and stroke to the job at hand is essential to completing the large amount of work in the shortest amount of time.
For example, this shop used a pneumatic-powered UTR 70 with a 0.7-millimeter stroke at 35,000 strokes a minute on the mold in the photo above. If they chose a shorter stroke unit at 0.3 millimeter, the process would be faster, but it would not cover the depth of the rib, and if the shop went with a longer-stroke tool (1.2-millimeter stroke), it would chatter or hit the bottom of the rib, slowing the process down and, perhaps, causing additional work. These examples emphasize the importance of using the correct polishing tools.
2. Choose the appropriate abrasives.
The mold polisher has choices ranging from diamond files, coated abrasives, polishing stones and ceramic super stones in various grits. It will take several steps using a variety of abrasives to obtain the final finish. First, start with a coarse grit to break down the scale and rough surface, leaving rough scratches, and then remove these scratches with finer ones until you achieve the desired final finish.
A type of polishing stone, called a “ceramic super stone,” available in many different grits and widths, was selected for the mold in the photo.
The finer the finish, the more steps it will take to polish.
3. Follow the right polishing process.
Generally, start with a coarse grit stone and work your way up to fine grit, removing the previous grit marks until you reach the desired finish. Polishing the steel enables the plastic material to release from the steel after the plastic has been injected into the mold and cooled and the mold then opens to eject the final part.
Always refer to the final finish specification on the SPI Finish Chart. Polish this tool until it reaches the final finish specified.
4. Perform final finish.
The finer the finish, the more steps it will take to polish. For this project, the shop used 1 × 4 × 100 millimeter ceramic super stones to cut through the EDM scale. They started with a green PN# SS14GR 100 grit, then a blue PN# SS14BL 800 grit (as pictured) and finally a red PN# SS14R 1200 grit. This process ensured good release of the ribs in this part and avoided the risk of parts getting stuck in the mold.
You may need additional abrasives and polishing materials, including sandpaper, felt buffs or diamond compounds, to get an SPI A2 or A1 mirror finish on a mold.


Related Content

Considerations for Mold Base Material Selection
Choosing the right material can greatly affect the profitability and cost of your application.
Read More
The Benefits of Hand Scraping
Accuracy and flatness are two benefits of hand scraping that help improve machine loop stiffness, workpiece surface finish and component geometry.
Read More
Laser Welding Versus Micro Welding
The latest battle in finely detailed restoration/repair of mold materials.
Read More
What You Should Consider When Purchasing Modified P20 Steel
When buying P20 steels that have been modified, moldmakers must be aware of the variations and key issues that affect delivery, cost and lead times.
Read MoreRead Next

Rethinking How to Polish
Internal process documentation helps polishers build upon experience and overcome surface finish challenges.
Read More